The Future of Web Dev
The Future of Web Dev
Build Multi-Author Blogs Fast with SvelteKit Shadcn Starter
Build technical/personal blogs with SvelteKit and shadcn-svelte components. Includes dark mode, multi-author support, and automatic SEO features.
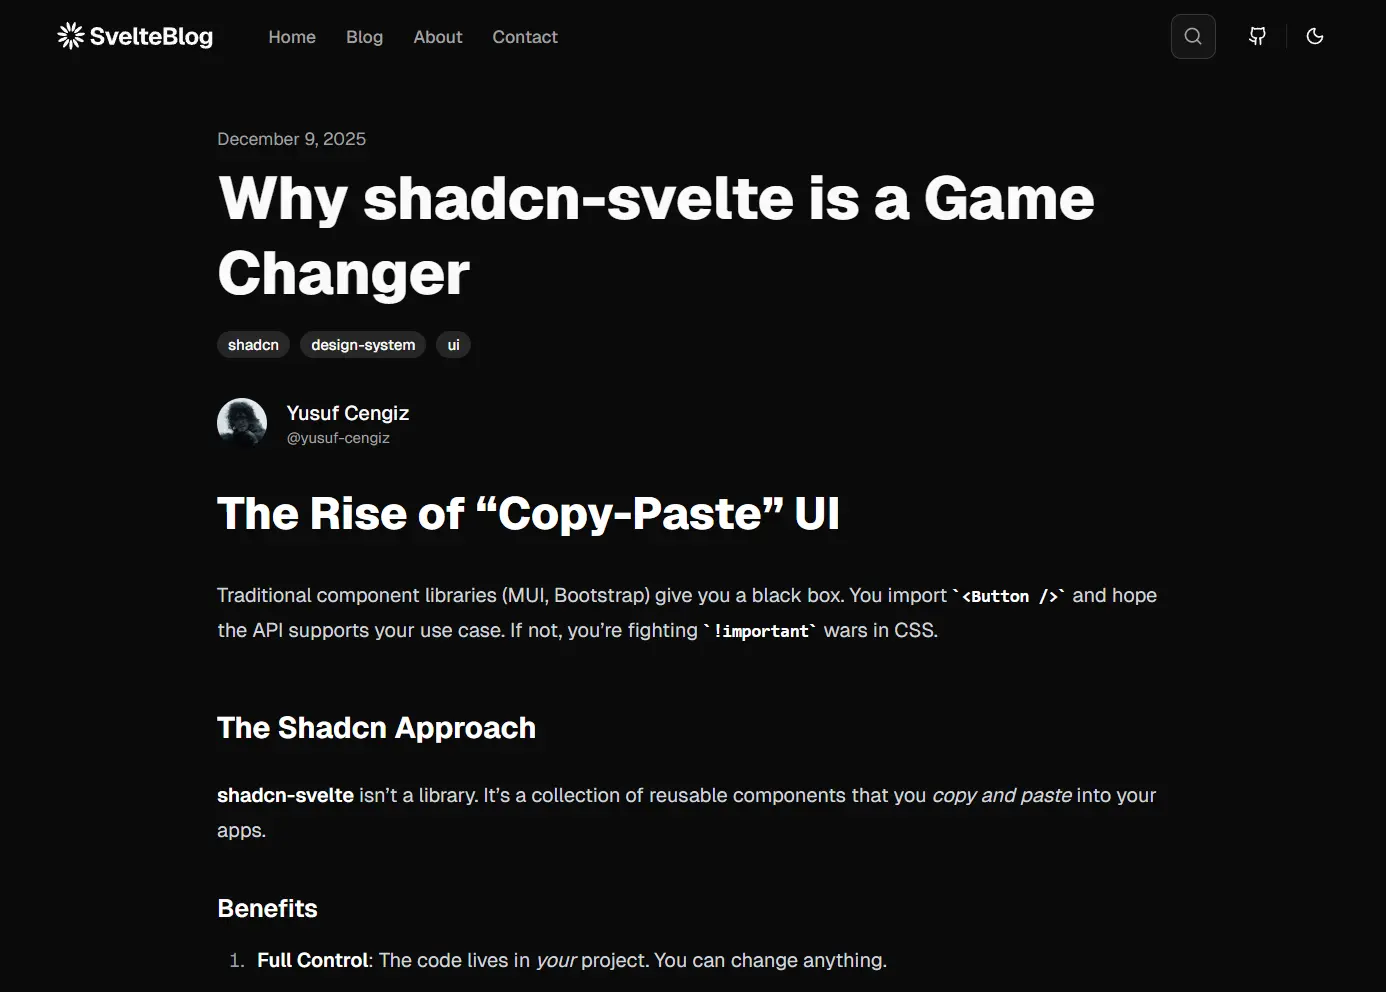
SvelteKit Shadcn Blog Starter is a modern, product-ready blog template that combines SvelteKit, shadcn-svelte components, Tailwind CSS, and MDsveX for markdown processing.
You can use it to build a functional blogging platform with modern UI components, dark mode support, and automated SEO features.
The template handles multi-author content, tag organization, RSS feed generation, and sitemap creation without additional configuration.
Features
⚡ Quick Deployment: Clone the repository and deploy to Netlify, Vercel, or Cloudflare Pages in under five minutes.
📝 MDsveX Integration: Write posts in Markdown and embed Svelte components directly in your content.
🎨 shadcn-svelte Components: Pre-built, accessible UI components styled with Tailwind CSS utility classes.
🌙 Dark Mode Support: Switch between light and dark themes with automatic system preference detection.
📱 Mobile-First: All layouts adapt to different screen sizes.
🔍 Live Search: Search through posts by title, description, or content.
👥 Multi-Author: Assign different authors to posts and generate dedicated profile pages automatically.
🏷️ Tag Organization: Group posts by tags and create archive pages for each tag category.
📊 SEO Automation: Generate sitemap.xml and RSS feed files on build.
⚙️ TypeScript: Write type-safe code with full IntelliSense support in your editor.
Use Cases
- Technical Documentation Sites: Create API documentation or framework guides with code examples embedded in Markdown files.
- Developer Portfolio Blogs: Showcase projects and write technical tutorials with syntax highlighting and component demos.
- Team Knowledge Bases: Build internal documentation sites where multiple team members can author and maintain content.
- Product Announcement Platforms: Publish release notes and feature updates with consistent formatting and automatic RSS distribution.
How to Use It
1. Clone the repository from GitHub and install dependencies with npm.
git clone https://github.com/YusufCeng1z/sveltekit-shadcn-blog-starter.git
cd sveltekit-shadcn-blog-starter
npm install
2. Start the development server to preview your blog locally.
npm run dev3. Open your browser to http://localhost:5173 to see the default blog layout.
4. Edit the site configuration file at src/lib/config/site.ts to customize your blog metadata.
export const siteConfig = {
  name: "Sveltekit shadcn blog starter",
  url: "https://sveltekit-blog-starter.netlify.app",
  ogImage: "https://sveltekit-blog-starter.netlify.app/images/blog-starter.jpg",
  description:
      "A blog starter built with SvelteKit, shadcn-svelte, Tailwind CSS, and MDsveX.",
  links: {
      twitter: "https://github.com/YusufCeng1z",
      github: "https://github.com/YusufCeng1z/sveltekit-shadcn-blog-starter",
  },
  keywords: `Svelte, SvelteKit, Tailwind CSS, Shadcn, MDsveX, Blog Starter`,
  nav: [
      {
          title: "Home",
          href: "/",
      },
      {
          title: "Blog",
          href: "/blog",
      },
      {
          title: "About",
          href: "/about",
      },
      {
          title: "Contact",
          href: "/contact",
      },
  ]
};
export type SiteConfig = typeof siteConfig;
5. Create a new Markdown file in the src/posts/ directory. Each post requires frontmatter metadata at the top of the file.
---
title: "Hello World: Introducing the Blog Starter"
description: "A deep dive into the features of this SvelteKit, MDsveX, and Shadcn starter kit."
date: "2025-12-07"
tags: ["sveltekit", "mdsvex", "shadcn", "starter"]
author: "yusuf-cengiz"
---
# Welcome to the SvelteKit Blog Starter
This blog starter is built with [SvelteKit](https://kit.svelte.dev/), [MDsveX](https://mdsvex.pngwn.io/), and [Tailwind CSS](https://tailwindcss.com/). It's designed to be minimal, performant, and easy to customize.
## Features
- **MDsveX**: Write your blog posts in Markdown with Svelte components.
- **Shadcn UI**: Beautiful, accessible components.
- **Tailwind CSS**: Utility-first CSS framework.
- **Authors & Tags**: Built-in support for author profiles and tagging.
## How to use
1. Clone the repository.
2. Install dependencies: `npm install`.
3. Start the development server: `npm run dev`.
## Code Example
```svelte
<script>
    let count = 0;
</script>
<button on:click={() => count++}>
    Clicks: {count}
</button>
```
Stay turned for more updates!
6. The starter automatically generates a blog post page at /blog/understanding-sveltekit-routing based on the filename. You can embed Svelte components directly in your Markdown content.
<script>
  import CustomButton from '$lib/components/CustomButton.svelte';
</script>
Try this interactive example:
<CustomButton label="Click Me" />
7. Add author information to create multi-author blogs. Each author gets a dedicated profile page at /authors/[author-id]. Configure author details in your author configuration file.
// src/lib/config/authors.ts
export const authors = {
  "yusuf-cengiz": {
    name: "Yusuf Cengiz",
    bio: "Frontend Developer & UI/UX Enthusiast",
    avatar: "https://github.com/YusufCeng1z.png",
    twitter: "https://github.com/YusufCeng1z",
    github: "https://github.com/YusufCeng1z",
  },
};
export type Author = keyof typeof authors;
8. Tags specified in post frontmatter generate automatic archive pages. When you publish a post with tags like ["react", "typescript"], the starter creates pages at /tags/react and /tags/typescript.
9. Create an optimized production build when you finish customization.
npm run build10. Preview the production build locally before deployment.
npm run previewDeployment
The starter includes a Netlify adapter by default. Push your code to GitHub and connect the repository in your Netlify dashboard. Netlify detects the build configuration automatically.
For other platforms, swap the adapter in svelte.config.js. Install the appropriate adapter package and update the configuration.
// For Vercel
import adapter from '@sveltejs/adapter-vercel';
// For Cloudflare Pages
import adapter from '@sveltejs/adapter-cloudflare';
// For Node.js servers
import adapter from '@sveltejs/adapter-node';
Each adapter handles platform-specific build requirements and optimizations.
Related Resources
- SvelteKit: Learn the full-stack web framework that powers this starter template.
- shadcn-svelte: Explore the complete collection of accessible UI components used in this template.
- MDsveX: Read documentation for the Markdown processor that enables Svelte components in Markdown files.
- Tailwind CSS: Reference the utility-first CSS framework used for styling all components.
FAQs
Q: How do I add syntax highlighting to code blocks?
A: Install a rehype plugin like rehype-prism-plus and add it to your mdsvex.config.js file. The plugin automatically highlights code blocks in your Markdown posts without additional configuration.
Q: Does this template support draft posts?
A: Add a published: false field to any post’s frontmatter. The post file remains in your repository but does not appear in production builds. You can preview draft posts in development mode.
Q: Can I customize the blog post URL structure?
A: Yes. Rename files in the posts directory or modify the routing logic in src/routes/blog/[slug]/+page.ts.
Q: How do I add a newsletter signup form?
A: Create a Svelte component for your newsletter provider’s embed code and import it into your blog layout or individual posts.
Q: How does the search functionality work?
A: The search component indexes the titles and descriptions of your Markdown files. It filters results in real-time as the user types.