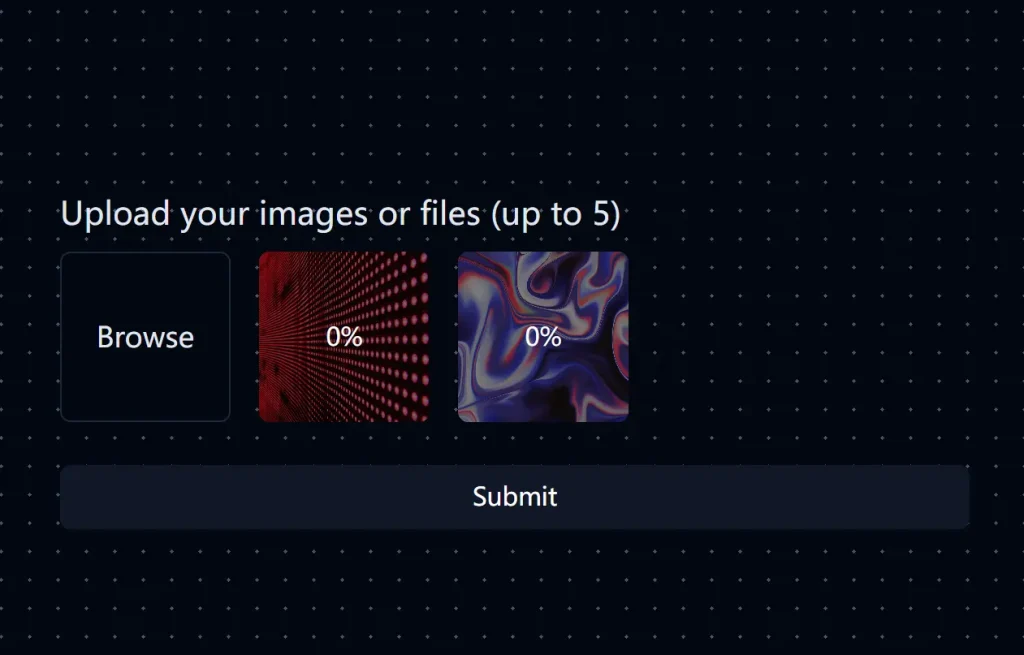
Next.js Multi-Image Upload is a reusable image upload component crafted with Next.js, TypeScript, and Tailwind CSS. The component provides precise image management capabilities with progress tracking and deletion feedback systems.
The component integrates several modern web technologies to create an image upload experience that puts control in your hands. It includes form validation through react-hook-form, styled components via shadcn/ui, and secure API integrations for handling file transfers.
Features
⬆️ Multi-Image Upload: You can select and upload several images at once. You can also set a maximum limit.
🔄 Progress Tracking: Users see the upload progress for each image. This is shown as a percentage overlay.
📝 Form Integration: It works with react-hook-form. You get controlled form validation and error handling.
🎨 Customizable: You can change the styling using Tailwind CSS classes. Props allow for further extension.
📱 Responsive Design: The layout adapts to different screen sizes. It uses a flex-based design from Tailwind CSS.
🗑️ Deletion Feedback: When an image is being deleted, a glow-and-dim animation confirms the action.
🛡️ Type-Safe: TypeScript ensures type safety for props and internal state.
🔗 API Support: It works with server-side APIs for generating signed URLs and handling uploads/deletions.
Use Cases
- E-commerce Product Listings: Imagine an online store where sellers add multiple product images. This component lets them upload, preview, and manage images quickly.
- Content Management Systems (CMS): A blog or news site might need to handle many images for articles. With this component, editors can easily upload and organize images for each post.
- Social Media Platforms: Users often upload multiple photos in a single post. This component makes it simple to handle these uploads while providing progress feedback.
- Portfolio Websites: Photographers or designers can showcase their work. They can upload multiple high-resolution images and manage them.
- Real Estate Applications: Property listings often have multiple images. Agents can easily upload and arrange photos of rooms, exteriors, and amenities.
Installation
1. To get started, mark sure your development environment is set up with the following tools & packages:
- Node.js (v18+ recommended)
- Bun, or npm/yarn/pnpm as the package manager
- Next.js project with TypeScript configured
- Tailwind CSS installed
- shadcn/ui components (
button,form,label) installed - react-hook-form and @hookform/resolvers/zod for form validation
- zod for schema validation
- lucide-react for icons
2. Clone the Repository (optional):
   git clone https://github.com/jacksonkasi0/nextjs-multi-image-upload.git
   cd nextjs-multi-image-upload
3. Install Dependencies:
bun install4. Set Up Environment Variables:
Copy example.env to .env and configure your API keys for signed URL generation and other services like AWS S3.
5. Run the Development Server:
bun devOpen http://localhost:3000 to see the app in action.
Usage
Integrating into Your Project
Copy these files into your project:
src/components/multi-image-upload.tsxsrc/api/upload-api.tssrc/app/api/upload/signed-url/route.tssrc/app/api/upload/delete/route.tssrc/components/background.tsx(optional)
Add the necessary dependencies with these commands:
bun add react-hook-form @hookform/resolvers/zod zod lucide-react
bun add -D tailwindcss postcss autoprefixer @types/react @types/node typescript
If you’re using shadcn/ui, initialize it:
npx shadcn-ui@latest init
npx shadcn-ui@latest add button form label
Configure Tailwind CSS
Edit your tailwind.config.ts to include the glow-effect animation:
// Other configurations...
animation: {
  "glow-effect": "glow-effect 1.5s infinite ease-in-out",
},
keyframes: {
  "glow-effect": {
    "0%, 100%": {
      boxShadow:
        "0 0 10px var(--muted-foreground), 0 0 20px var(--muted)",
      opacity: "1",
    },
    "50%": {
      boxShadow:
        "0 0 20px var(--primary), 0 0 40px var(--primary-foreground)",
      opacity: "0.5",
    },
  },
},
// Other configurations...
plugins: [require("tailwindcss-animate")],
Install tailwindcss-animate:
bun add -D tailwindcss-animateMake sure that your setup defines the required CSS variables.
Example Usage
Use MultiImageUpload with react-hook-form like this:
"use client";
import React from "react";
import { useForm } from "react-hook-form";
import { zodResolver } from "@hookform/resolvers/zod";
import * as z from "zod";
import { Button } from "@/components/ui/button";
import {
  Form,
  FormControl,
  FormField,
  FormItem,
  FormLabel,
  FormMessage,
} from "@/components/ui/form";
import { MultiImageUpload } from "@/components/multi-image-upload";
import Background from "@/components/background";
const schema = z.object({
  images: z
    .array(z.string().url())
    .min(1, "At least 1 image is required")
    .max(5, "Maximum 5 images allowed"),
});
type FormData = z.infer<typeof schema>;
export default function Page() {
  const form = useForm<FormData>({
    resolver: zodResolver(schema),
    defaultValues: { images: [] },
  });
  const onSubmit = (data: FormData) => {
    console.log("Submitted:", data.images);
  };
  return (
    <Background>
      <div className="min-h-screen flex items-center justify-center p-4">
        <Form {...form}>
          <form
            onSubmit={form.handleSubmit(onSubmit)}
            className="space-y-6 w-full max-w-lg"
          >
            <FormField
              control={form.control}
              name="images"
              render={({ field }) => (
                <FormItem>
                  <FormLabel>Images</FormLabel>
                  <FormControl>
                    <MultiImageUpload
                      value={field.value}
                      onChange={field.onChange}
                      maxImages={5}
                      className="my-4"
                    />
                  </FormControl>
                  <FormMessage />
                </FormItem>
              )}
            />
            <Button type="submit" className="w-full">
              Submit
            </Button>
          </form>
        </Form>
      </div>
    </Background>
  );
}
Set Up API Routes
Place signed-url/route.ts and delete/route.ts in your src/app/api/upload/ directory. Update upload-api.ts if your backend is different from the example.
Related Resources
- Next.js Documentation: Official resource for learning Next.js. Next.js Documentation
- react-hook-form Documentation: Learn how to use
react-hook-formfor form management. react-hook-form Documentation - shadcn/ui Documentation: Explore the
shadcn/uicomponents used in this project. shadcn/ui Documentation - Tailwind CSS Documentation: Learn to style with the utility classes of Tailwind CSS. Tailwind CSS Documentation
FAQs
Q: What is the maximum number of images I can upload?
A: The default is 5, but you can change this with the maxImages prop.
Q: Can I use a different backend for storing images?
A: Yes, you can. Update the API logic in upload-api.ts to connect to your preferred backend (like AWS S3 or Cloudinary).
Q: How do I style this component?
A: Use Tailwind CSS classes. Add custom styles through the className prop.
Q: Is this component accessible?
A: Yes. It is built with accessibility in mind, using standard HTML elements.
Q: Do I need to use shadcn/ui?
A: While recommended, it is possible to use the core logic with other UI component libraries. Adapt the styles as needed.
Q: How do I handle larger image uploads?
A: You can adjust the max file size allowed by configuring your server or cloud service to accept larger files, ensuring that your API handles large file uploads efficiently.
Q: Is there any built-in image resizing feature?
A: The component does not include image resizing, but you can integrate server-side image processing tools like AWS Lambda or Cloudinary to resize images before uploading.
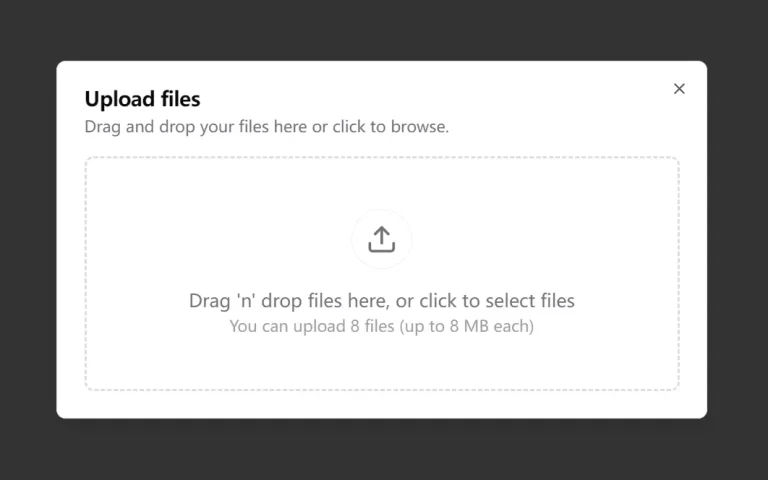
Preview