The Future of Web Dev
The Future of Web Dev
Nuxt Keycloak: Authentication Module with SSR and Role-Based Guards
Authentication module for Nuxt with Keycloak SSR support, auto token refresh, role-based guards, and TypeScript. Secure your app in minutes.
Nuxt Keycloak is an authentication module that integrates Keycloak identity and access management into Nuxt applications.
It handles both client-side and server-side rendering scenarios, provides automatic token refresh mechanisms, and includes role-based route protection capabilities.
Features
🔐 Hybrid Authentication Modes: Works with both single-page application and server-side rendering architectures.
🔄 Automatic Token Refresh: Renews access tokens before expiration without user intervention.
🛡️ Role-Based Route Guards: Restricts access to pages based on realm roles and client-specific roles.
🔍 Silent Check-SSO: Verifies authentication status without redirecting users or interrupting their experience.
🔑 Server-Side JWT Verification: Validates tokens using JWKS endpoints with the jose library.
⚙️ Flexible Configuration: Enables or disables features through configuration options.
🚀 Production-Ready: Includes error handling, logging, and security best practices.
🎯 Zero Manual Setup: Generates required HTML files automatically in the public directory.
Use Cases
- Enterprise Web Applications: Build internal tools and dashboards that require single sign-on integration with existing Keycloak infrastructure.
- Multi-Tenant SaaS Platforms: Implement role-based access control where different user types need access to different features and data.
- API Gateway Protection: Secure server-side API routes with JWT verification and role checking before processing requests.
- Hybrid Rendering Applications: Create applications that need authentication in both server-rendered pages and client-side navigation scenarios.
How to Use It
1. Install the keyclock module in your Nuxt project.
pnpm add nuxt-keycloaknpm install nuxt-keycloakyarn add nuxt-keycloak2. Add nuxt-keycloak to the modules array in your nuxt.config.ts file. You also need to provide the basic Keycloak configuration details.
export default defineNuxtConfig({
  modules: ['nuxt-keycloak'],
  keycloak: {
    url: 'http://localhost:8080',
    realm: 'your-realm',
    clientId: 'your-client-id',
  }
})
3. For better security and flexibility across different environments, you can use environment variables.
NUXT_PUBLIC_KEYCLOAK_URL=http://localhost:8080
NUXT_PUBLIC_KEYCLOAK_REALM=your-realm
NUXT_PUBLIC_KEYCLOAK_CLIENT_ID=your-client-id
4. To manage authentication in your Vue components, use the useKeycloak composable. This provides access to authentication state and methods.
<script setup>
const { isAuthenticated, user, login, logout } = useKeycloak()
</script>
<template>
  <div>
    <div v-if="isAuthenticated">
      <p>Hello, {{ user?.preferred_username }}</p>
      <button @click="logout()">Sign Out</button>
    </div>
    <div v-else>
      <button @click="login()">Sign In</button>
    </div>
  </div>
</template>
5. You can protect individual pages by adding middleware to the page metadata.
<!-- pages/protected-area.vue -->
<script setup>
definePageMeta({
  middleware: 'keycloak-auth'
})
</script>
6. For more granular control, you can restrict access based on Keycloak roles. Define the required roles in the page metadata.
<!-- pages/administrator-panel.vue -->
<script setup>
definePageMeta({
  middleware: ['keycloak-auth', 'keycloak-role'],
  keycloakRoles: {
    realm: ['administrator'],
    resource: {
      clientId: 'your-app-client',
      roles: ['editor']
    }
  }
})
</script>
7. The module also provides server utilities to protect your API routes. These are auto-imported into your server files.
To require authentication for an API route:
// server/api/user/profile.ts
export default defineEventHandler(async (event) => {
  const user = requireKeycloakAuth(event)
  return {
    message: 'This is protected user data',
    user
  }
})
To require a specific realm role:
// server/api/admin/settings.ts
export default defineEventHandler(async (event) => {
  const user = requireRealmRole(event, 'admin')
  return {
    message: 'This is protected admin data',
    user
  }
})
8. The module accepts several configuration options to customize behavior.
export default defineNuxtConfig({
  keycloak: {
    url: 'http://localhost:8080',
    realm: 'my-realm',
    clientId: 'my-client',
    initOptions: {
      onLoad: 'check-sso',
      pkceMethod: 'S256',
      flow: 'standard',
      checkLoginIframe: false,
      silentCheckSsoRedirectUri: 'http://localhost:3000/silent-check-sso.html'
    },
    server: {
      verifyToken: true,
      middleware: false,
      jwksCacheDuration: 600000,
      rejectUnauthorized: true
    },
    client: {
      autoRefreshToken: true,
      minTokenValidity: 30,
      persistRefreshToken: true
    }
  }
})
The initOptions object controls how Keycloak initializes on the client side. The onLoad parameter determines whether to check authentication status silently or require login immediately. The pkceMethod setting uses S256 for enhanced security during the authorization code flow.
The server configuration controls token verification behavior. Set verifyToken to true for full JWKS verification, false to disable verification, or 'decode' to only decode tokens when a reverse proxy handles verification.
The client configuration manages token refresh behavior. When autoRefreshToken is enabled, the module automatically refreshes tokens when they have less than the specified minTokenValidity seconds remaining.
Reverse Proxy Deployment
When deploying behind Traefik or another reverse proxy that verifies JWT tokens, configure the module to trust the proxy’s verification.
export default defineNuxtConfig({
  keycloak: {
    url: process.env.NUXT_PUBLIC_KEYCLOAK_URL,
    realm: process.env.NUXT_PUBLIC_KEYCLOAK_REALM,
    clientId: process.env.NUXT_PUBLIC_KEYCLOAK_CLIENT_ID,
    server: {
      verifyToken: 'decode',
      middleware: true,
    },
  }
})
You can also use an environment variable for this setting.
NUXT_KEYCLOAK_SERVER_VERIFY_TOKEN=decodeOnly use decode mode when tokens are pre-verified by a trusted reverse proxy. This mode skips signature and expiration validation.
Composable API
The useKeycloak() composable provides access to authentication state and methods.
const {
  keycloak,
  isAuthenticated,
  isInitialized,
  user,
  token,
  tokenParsed,
  login,
  logout,
  register,
  updateToken,
  loadUserProfile,
  hasRealmRole,
  hasResourceRole,
  isTokenExpired
} = useKeycloak()
Check if a user has specific roles.
const canAccessAdmin = hasRealmRole('admin')
const canManage = hasResourceRole('manager', 'my-app')
Manually refresh the token when needed.
await updateToken(30)Server Utilities
The module provides several server-side utilities that are auto-imported in server routes.
verifyKeycloakToken(token)
extractToken(event)
getKeycloakUser(event)
getKeycloakToken(event)
isAuthenticated(event)
hasRealmRole(event, role)
hasResourceRole(event, role, resource)
requireKeycloakAuth(event)
requireRealmRole(event, role)
requireResourceRole(event, role, resource)
These utilities can also be explicitly imported from nuxt-keycloak/server if needed.
Keycloak Configuration
Set up Keycloak to work with your Nuxt application.
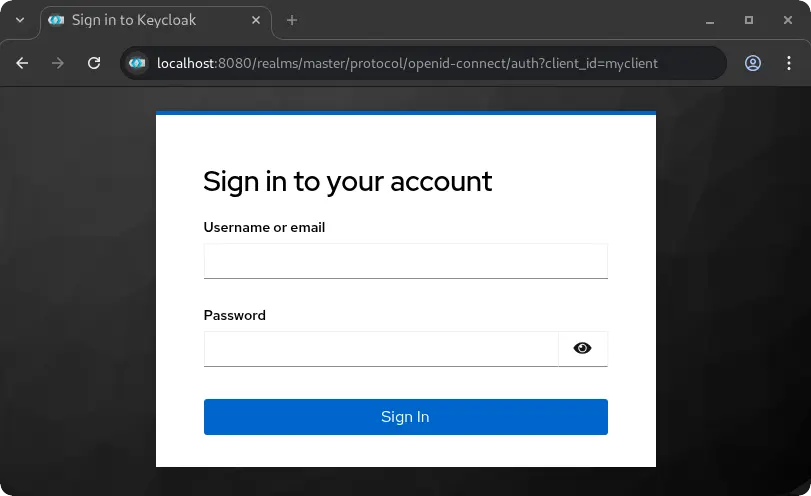
Create a new client in the Keycloak admin console with the following settings.
- Client ID: Your application name
- Client Protocol: openid-connect
- Access Type: public
- Valid Redirect URIs: Your application URLs with wildcards
- Web Origins: Your application origins for CORS
Enable the Standard Flow in client settings. Disable Implicit Flow and use PKCE instead for better security.
Create realm roles or client roles as needed. Assign these roles to users through the Keycloak admin interface.
Related Resources
- Keycloak Documentation – Official documentation for Keycloak server configuration and concepts.
- Nuxt Documentation – Official guide to Nuxt 3 and Nuxt 4 framework features.
- jose Library – JavaScript module for JWT token verification used by this module.
- keycloak-js – Official Keycloak JavaScript adapter documentation.
FAQs
Q: How do I handle CORS errors when connecting to Keycloak?
A: Add your application’s origin to the Web Origins field in your Keycloak client configuration. This tells Keycloak to include the appropriate CORS headers in responses.
Q: What’s the difference between realm roles and resource roles?
A: Realm roles apply across the entire Keycloak realm and are global to all clients. Resource roles (also called client roles) are specific to individual clients and provide more granular access control.
Q: How do I customize the redirect URLs after login or logout?
A: Pass a redirect URI parameter to the login or logout methods. You can also configure default redirect URIs in your Keycloak client settings.
Q: Does Nuxt Keycloak support Static Site Generation (SSG)?
A: Nuxt Keycloak is primarily designed for Server-Side Rendering (SSR) and Single-Page Application (SPA) modes due to the dynamic nature of authentication. Full authentication flows in a purely static site are not supported.
Q: How do I handle token expiration?
A: The module can automatically refresh tokens. You can enable the autoRefreshToken option in the client configuration to handle this.
Q: Can I use this module without a reverse proxy?
A: Yes, the module can perform full JWT verification using JWKS by default. The option to decode tokens without verification is for specific scenarios where a trusted reverse proxy already handles validation.
Q: Where do I define user roles?
A: User roles are managed within your Keycloak administration console. You can create realm-level or client-level roles and assign them to your users.