The Future of Web Dev
The Future of Web Dev
Full-Stack Next.js & Cloudflare Starter Template with D1 R2 KV
Start building full-stack Next.js apps on Cloudflare with pre-configured D1, R2, KV, and TypeScript. Includes repository pattern and testing.
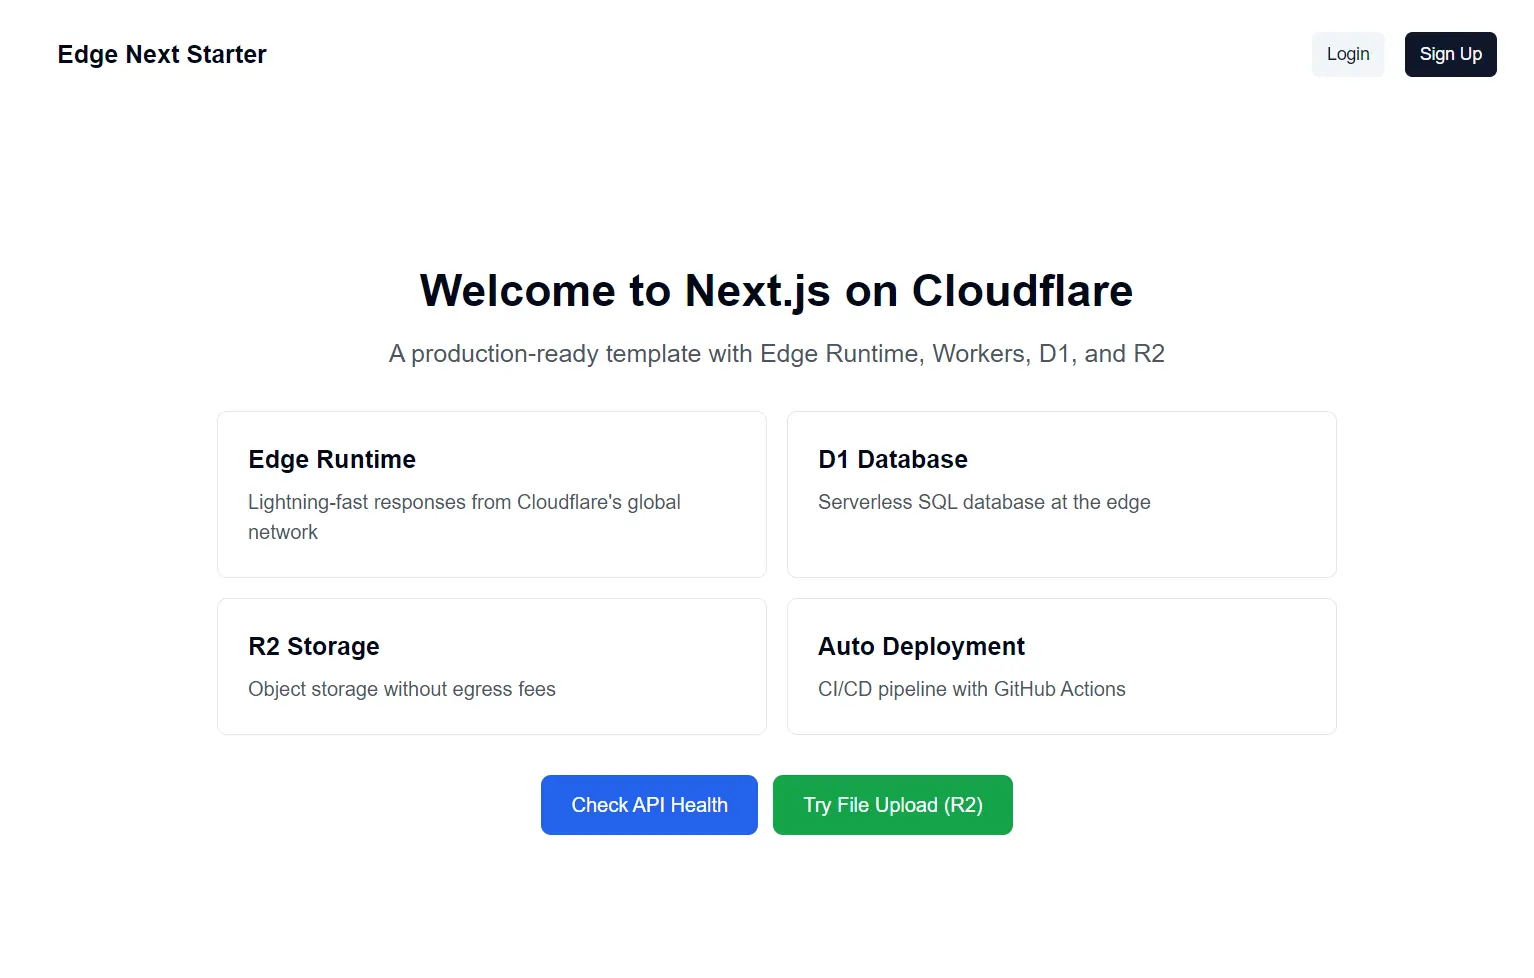
Next.js + Cloudflare Full-Stack Starter is a ready-to-use template that combines Next.js App Router with Cloudflare’s edge services for building complete applications.
It provides immediate access to D1 database, R2 storage, KV cache, and Analytics Engine through a unified setup.
You can use the starter to deploy full-stack applications to Cloudflare Pages without manual resource configuration or complex integration work.
Features
⚡ Edge Runtime Deployment: Runs Next.js applications on Cloudflare’s global network with automatic geographic distribution and minimal cold start times.
🗄️ Integrated D1 Database: Provides SQLite database access at the edge with Prisma ORM integration and automated migration scripts.
📦 R2 Object Storage: Includes pre-configured client for file uploads and retrieval with zero egress costs and S3-compatible API.
🚀 KV Cache Layer: Implements high-performance key-value storage for session data, rate limiting, and response caching.
📊 Analytics Engine Hooks: Built-in request tracing and structured logging ready for production observability.
🔒 Environment Validation: Uses Zod schemas to validate configuration variables at build time and prevent runtime errors.
🧪 Test Coverage: Ships with Vitest tests for repository layer, database operations, cache functions, and storage clients.
🔄 Automated CI/CD: GitHub Actions workflows handle testing, building, and deployment to test and production environments.
Use Cases
- API Backend Development: Build RESTful APIs or GraphQL servers that need low-latency database access and file handling at multiple geographic locations.
- Content Management Systems: Create admin interfaces for managing posts, media assets, and user data with automatic CDN distribution.
- SaaS Application Infrastructure: Deploy multi-tenant applications with per-user rate limiting, authentication, and isolated data storage.
- Serverless Data Processing: Handle webhook receivers, image transformations, or scheduled tasks that require database persistence and object storage.
How to Use It
Initial Setup
1. Clone the repository and install Node.js 20 or higher.
git clone https://github.com/TangSY/edge-next-starter.git
cd cloudflare-worker-template
nvm install
nvm use
npm install -g pnpm
pnpm install
2. The post-install hook generates the Prisma Client automatically. Copy the example environment files to create local configuration.
cp .env.local.example .env.local
cp .dev.vars.example .dev.vars
3. Generate a secure authentication secret using OpenSSL and replace the placeholder value in .env.local.
openssl rand -base64 324. Update NEXTAUTH_SECRET in .env.local with the generated string. Each environment requires a unique secret for security.
Cloudflare Authentication
1. Log in to Cloudflare through the Wrangler CLI to enable resource management.
npx wrangler login2. The local development server uses Wrangler’s mock services for D1, R2, and KV. Remote environments require manual resource creation.
Database Configuration
1. Create the D1 database for test or production environments.
pnpm run db:create:test
pnpm run db:create:prod
2. Copy the database ID from the output into the corresponding wrangler.test.toml or wrangler.prod.toml file under the [[d1_databases]] section.
3. Run migrations to initialize the schema.
pnpm run db:migrate:local4. Seed test data for development.
pnpm run db:seed -- --env=localStorage Setup
1. Enable R2 in the Cloudflare Dashboard before creating buckets. Navigate to your account, select R2 from the sidebar, and complete the activation process.
2. Create R2 buckets for file storage.
pnpm run r2:create:test
pnpm run r2:create:prod
3. Create KV namespaces for caching.
pnpm run kv:create:test
pnpm run kv:create:prod
4. Add the resulting namespace IDs to [[kv_namespaces]] sections in the environment-specific Wrangler configuration files.
Development Server
1. Two development modes support different workflows. Standard Next.js development provides fast refresh for UI work.
pnpm dev2. This runs at http://localhost:3000 but does not include Cloudflare bindings. For testing database queries, file uploads, or cache operations, use the Cloudflare development server.
pnpm build
pnpm run pages:build
pnpm run cf:dev
3. Access the application at http://localhost:8788 with full Cloudflare runtime support.
Related Resources
- Cloudflare Pages Documentation – Official guide for deploying static sites and full-stack applications on Cloudflare’s edge network.
- Cloudflare D1 Documentation: The official documentation for Cloudflare’s serverless SQL database.
- Cloudflare R2 Documentation: Details on Cloudflare’s object storage service.
- Prisma D1 Documentation – Instructions for using Prisma ORM with Cloudflare D1 databases.
- Wrangler CLI Reference – Command-line tool documentation for managing Cloudflare Workers and Pages resources.
- Next.js Edge Runtime – Guide to building Next.js applications that run on edge compute platforms.
FAQs
Q: What should I do if npm install fails?
A: This project requires pnpm. Use the pnpm install command to install dependencies.
Q: Why are my Cloudflare bindings like D1 and R2 not available?
A: The standard pnpm dev command runs Next.js in isolation. To test Cloudflare integrations, you must use pnpm run cf:dev.
Q: My application reports that the database is not found. How can I fix this?
A: You need to run the database migrations first. Execute pnpm run db:migrate:local to set up the local database schema.
Q: What is the main difference between the pnpm dev and pnpm run cf:dev commands?
A: pnpm dev is optimized for rapid UI development and does not load Cloudflare services. pnpm run cf:dev runs a local simulation of the entire Cloudflare environment, which is necessary for full-stack testing.
Q: Do I need to create remote Cloudflare resources for local development?
A: No, the local development server provided by Wrangler automatically mocks D1, R2, and KV, so you do not need to create them remotely for local work.
Q: Do I need to pay for Cloudflare services with this template?
A: The free Workers plan covers most development and small production workloads. D1 gives 5 GB storage, R2 offers 10 GB/month, and KV provides 1 GB with generous read/write limits.