The Future of Web Dev
The Future of Web Dev
Production-Ready Laravel Starter Kit with Vue 3 and Nuxt UI
Production-ready Laravel starter kit with Vue, Inertia.js, and Nuxt UI. Complete authentication, testing, and dev tools pre-configured.

The Laravel Nuxt UI Starter Kit combines Laravel with Vue 3 and Nuxt UI components to help you build modern web applications.
You get a complete full-stack environment where Laravel handles the backend logic and Vue 3 manages the frontend, connected through Inertia.js for a single-page application experience without building a separate API.
Features
⚡ Authentication system with Laravel Fortify including login, registration, email verification, password reset, and two-factor authentication.
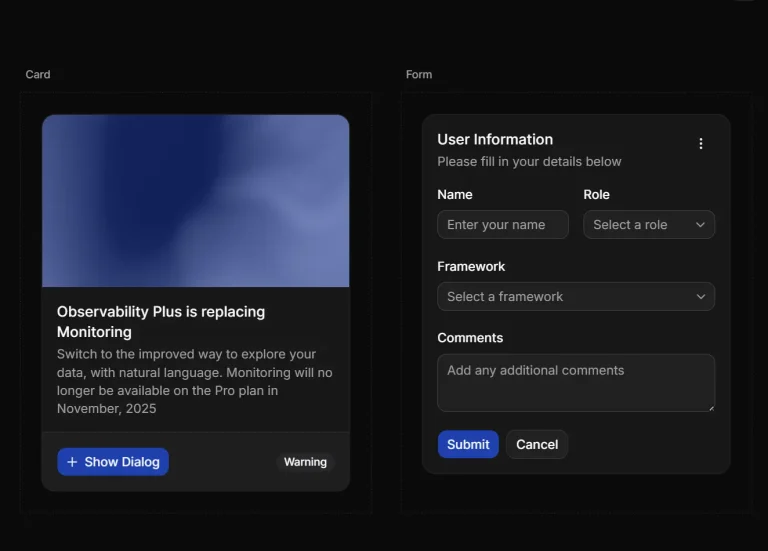
🎨 Nuxt UI component library integrated with Tailwind CSS for building modern interfaces without writing custom CSS.
🔒 Type-safe routing between Laravel and Vue using Laravel Wayfinder, preventing broken links and incorrect route parameters.
🧪 Pest PHP testing framework configured with 100% code coverage enforcement and parallel test execution.
📦 Inertia.js connecting Laravel and Vue 3, eliminating the need to build and maintain a separate REST or GraphQL API.
🚀 Vite build system for instant hot module replacement during development and optimized production bundles.
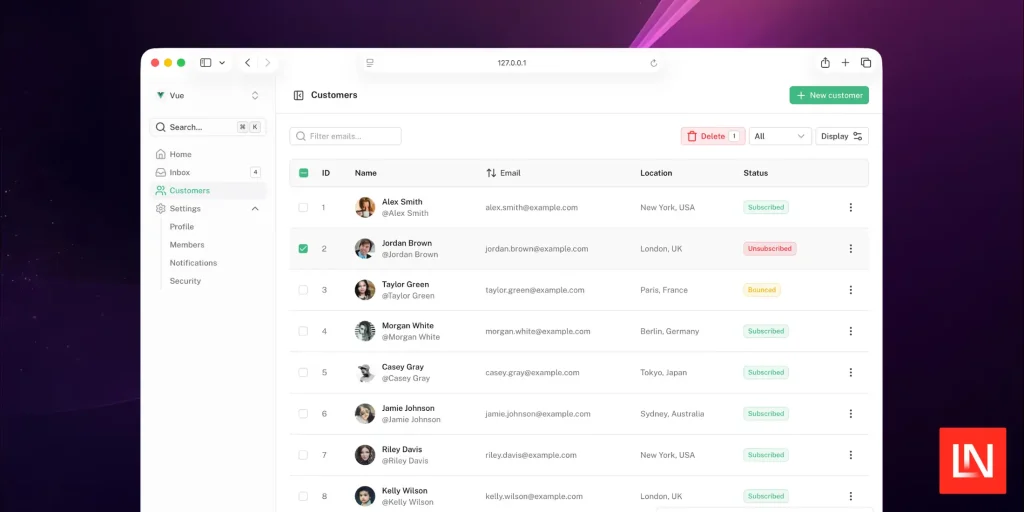
🎯 Pre-built sample pages including dashboard, customer management, inbox interface, and settings panels.
🔧 Laravel Horizon for monitoring and managing background queue jobs with a visual interface.
📊 Development tools bundle running Laravel server, queue worker, Laravel Pail log viewer, and Vite dev server concurrently.
✅ Code quality tools including PHPStan, Laravel Pint, Rector, ESLint, and Prettier configured and ready to use.
🐳 Laravel Sail Docker environment included for consistent development across different machines.
🌐 Server-side rendering support through Inertia.js for improved initial page load performance and SEO.
Preview
Use Cases
- SaaS Applications: You can build multi-tenant SaaS platforms using the provided authentication and user management features as a base.
- Internal Dashboards: The pre-built UI components and layouts are suitable for creating data-driven internal tools and administrative panels.
- Minimum Viable Products (MVPs): The kit allows you to bypass initial setup and focus directly on core features, which speeds up the process of launching a new product.
- Prototyping: You can quickly assemble functional prototypes for new application ideas to demonstrate concepts and gather feedback.
How to Use It
Creating a New Project
You can create a new project using three different methods. The Laravel installer method provides the fastest setup. Run the following command to create a new project named “my-app”:
laravel new my-app --kit=jkque/laravel-nuxt-ui-starter-kitThe Composer method works if you prefer using Composer directly:
composer create-project jkque/laravel-nuxt-ui-starter-kit my-appNavigate into the project directory and start the development environment:
cd my-app
composer run dev
This command installs all PHP dependencies via Composer, installs JavaScript dependencies via npm, generates your application key, runs database migrations, builds frontend assets, and starts multiple development services simultaneously. Your application becomes available at http://localhost:8000.
Manual Installation from Git Repository
Clone the repository directly if you want more control over the setup process:
git clone https://github.com/jkque/laravel-nuxt-ui-starter-kit.git my-app
cd my-app
composer setup
composer run dev
The composer setup command handles the initial configuration. Your environment file gets created from the example, dependencies get installed, and the application key gets generated automatically.
Environment Configuration
The starter kit uses SQLite by default. The database file gets created automatically during the first migration. You can switch to MySQL or PostgreSQL by modifying your .env file:
DB_CONNECTION=mysql
DB_HOST=127.0.0.1
DB_PORT=3306
DB_DATABASE=your_database_name
DB_USERNAME=your_username
DB_PASSWORD=your_password
Run migrations after configuring your database connection:
php artisan migrateDevelopment Workflow
The composer run dev command starts all development services in a single terminal window. This includes the Laravel development server on port 8000, a queue worker for background jobs, Laravel Pail for viewing logs in real-time, and the Vite development server for hot module replacement.
You can run services individually if you prefer separate terminal windows:
# Terminal 1: Laravel server
php artisan serve
# Terminal 2: Vite dev server
npm run dev
# Terminal 3: Queue worker
php artisan queue:listen
# Terminal 4: Log viewer
php artisan pail
Building Features
Create new Inertia pages in the resources/js/Pages/ directory. Each page component corresponds to a route in your Laravel application. Here’s an example of creating a simple products page:
<script setup lang="ts">
import { Head } from '@inertiajs/vue3'
defineProps<{
  products: Array<{
    id: number
    name: string
    price: number
  }>
}>()
</script>
<template>
  <Head title="Products" />
  <div>
    <h1>Products</h1>
    <ul>
      <li v-for="product in products" :key="product.id">
        {{ product.name }} - ${{ product.price }}
      </li>
    </ul>
  </div>
</template>
Define the corresponding route in routes/web.php:
use Inertia\Inertia;
Route::get('/products', function () {
    return Inertia::render('Products', [
        'products' => Product::all()
    ]);
})->name('products.index');
The Laravel Wayfinder integration provides type-safe routing in your Vue components:
<script setup lang="ts">
import { router } from '@inertiajs/vue3'
import { route } from '@/helpers'
const navigateToProduct = (id: number) => {
  router.visit(route('products.show', { product: id }))
}
</script>
Working with Nuxt UI Components
The starter kit includes Nuxt UI components pre-configured. Use them directly in your Vue components without additional setup:
<script setup lang="ts">
import { ref } from 'vue'
const isOpen = ref(false)
</script>
<template>
  <UButton @click="isOpen = true">
    Open Modal
  </UButton>
  <UModal v-model="isOpen">
    <UCard>
      <template #header>
        <h3>Modal Title</h3>
      </template>
      <p>Modal content goes here</p>
      <template #footer>
        <UButton @click="isOpen = false">Close</UButton>
      </template>
    </UCard>
  </UModal>
</template>
Forms benefit from Nuxt UI’s form components:
<template>
  <UForm :state="form" @submit="onSubmit">
    <UFormGroup label="Email" name="email">
      <UInput v-model="form.email" type="email" />
    </UFormGroup>
    <UFormGroup label="Password" name="password">
      <UInput v-model="form.password" type="password" />
    </UFormGroup>
    <UButton type="submit">Login</UButton>
  </UForm>
</template>
Testing Your Application
The starter kit enforces 100% test coverage using Pest. Run all tests with the coverage report:
composer testThis command runs type coverage analysis, executes all Pest tests with coverage reporting, checks code style with Pint and Rector, formats JavaScript with Prettier, and runs PHPStan static analysis.
Write Pest tests using the expressive syntax in the tests/ directory:
<?php
use App\Models\User;
test('user can update their profile', function () {
    $user = User::factory()->create();
    $this->actingAs($user)
        ->put('/user/profile', [
            'name' => 'Updated Name',
            'email' => '[email protected]',
        ])
        ->assertSuccessful();
    expect($user->fresh()->name)->toBe('Updated Name');
});
Run specific test files or filter by test name:
# Run specific test file
php artisan test tests/Feature/ProfileTest.php
# Filter by test description
php artisan test --filter="user can update their profile"
Code Quality and Formatting
Fix all code style issues automatically:
composer run lintThis runs Laravel Pint on PHP files, applies Rector refactoring rules, formats JavaScript with Prettier, and fixes ESLint issues. Run individual formatters if you need to format specific file types:
# Format PHP code
vendor/bin/pint
# Refactor PHP code
vendor/bin/rector
# Format JavaScript
npm run format
# Fix ESLint issues
npm run lint
Using Docker with Laravel Sail
The included Laravel Sail configuration provides a Docker-based development environment. Start all Docker containers:
./vendor/bin/sail up -dRun artisan commands, tests, and npm scripts through Sail:
# Run migrations
./vendor/bin/sail artisan migrate
# Install JavaScript dependencies
./vendor/bin/sail npm install
# Run tests
./vendor/bin/sail test
# Access shell
./vendor/bin/sail shell
Enabling Server-Side Rendering
Inertia.js supports server-side rendering for improved initial page load times. Start the development server with SSR enabled:
composer run dev:ssrBuild for production with SSR:
npm run build
php artisan inertia:start-ssr
Customizing Authentication
The starter kit includes complete authentication pages in resources/js/Pages/Auth/. Modify these pages to match your design requirements. The authentication logic uses Laravel Fortify, configured in config/fortify.php. Enable or disable features like two-factor authentication, email verification, and password confirmation:
'features' => [
    Features::registration(),
    Features::resetPasswords(),
    Features::emailVerification(),
    Features::updateProfileInformation(),
    Features::updatePasswords(),
    Features::twoFactorAuthentication([
        'confirm' => true,
        'confirmPassword' => true,
    ]),
],
Building Production Assets
Build optimized assets for production deployment:
npm run buildThe build process generates minified JavaScript and CSS files in the public/build/ directory. Deploy these files along with your Laravel application to your production server.
Related Resources
- Laravel Documentation provides complete guides for routing, database operations, authentication, and all Laravel framework features.
- Inertia.js Documentation explains how to build single-page applications using server-side routing and controllers.
- Nuxt UI Documentation contains examples and API references for all available UI components and styling options.
- Pest Documentation teaches expressive testing syntax and advanced testing techniques for PHP applications.
FAQs
Q: Does the starter kit support authentication providers like Google or GitHub?
A: Laravel Fortify handles the authentication foundation, but OAuth providers require additional setup. Install Laravel Socialite and configure it according to the documentation. You can create custom Fortify actions that integrate with Socialite for third-party authentication.
Q: How do I deploy this application to production?
A: Build your frontend assets using npm run build, configure your production environment variables, run database migrations on your production server, and point your web server to the public/ directory. Use Laravel Forge, Vapor, or any VPS that supports PHP 8.2+ and Node.js.
Q: What happens if I need a traditional REST API alongside Inertia?
A: You can add API routes in routes/api.php that return JSON responses. The starter kit focuses on Inertia for the main application, but nothing prevents you from adding Laravel Sanctum and building API endpoints for mobile apps or third-party integrations.
Q: Can I use a different component library instead of Nuxt UI?
A: You can replace Nuxt UI with any Vue 3 component library. Uninstall the Nuxt UI package, install your preferred library like PrimeVue or Vuetify, update your component imports, and adjust the Tailwind configuration if needed. The Inertia and Laravel integration remains unchanged.