The Future of Web Dev
The Future of Web Dev
Modern Shadcn Dashboard & Landing Page Templates for Vite and Next.js
Free shadcn/ui admin dashboard and landing page templates. Dual Vite and Next.js support, and a live tweakcn theme customizer.
Shadcn Dashboard Landing Template is a free, open-source admin dashboard and marketing landing page template that includes 30+ pages across two complete UI sets.
It currently works on two runtime environments: a Vite + React version for fast local development and a Next.js version with the App Router for production.
Both versions run on the same stack (TypeScript, Tailwind CSS, shadcn/ui, and Radix UI primitives) and share identical page coverage.
Features
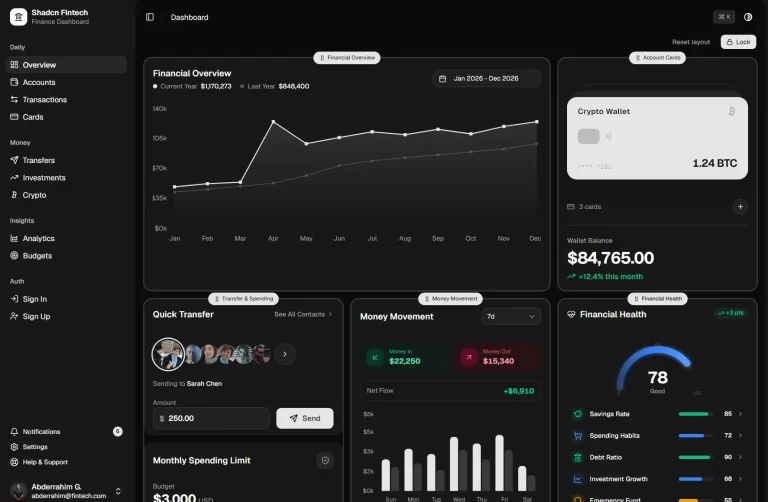
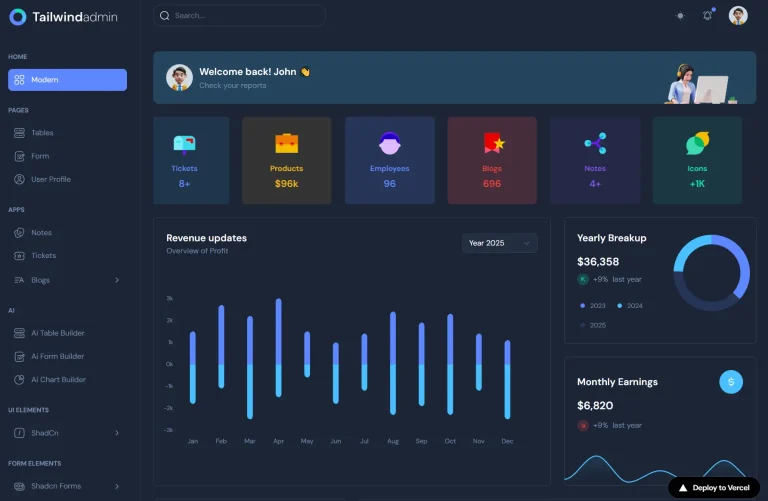
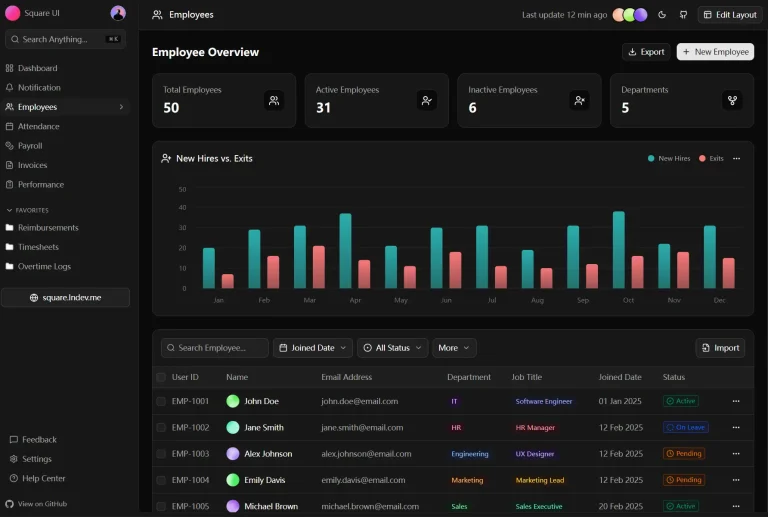
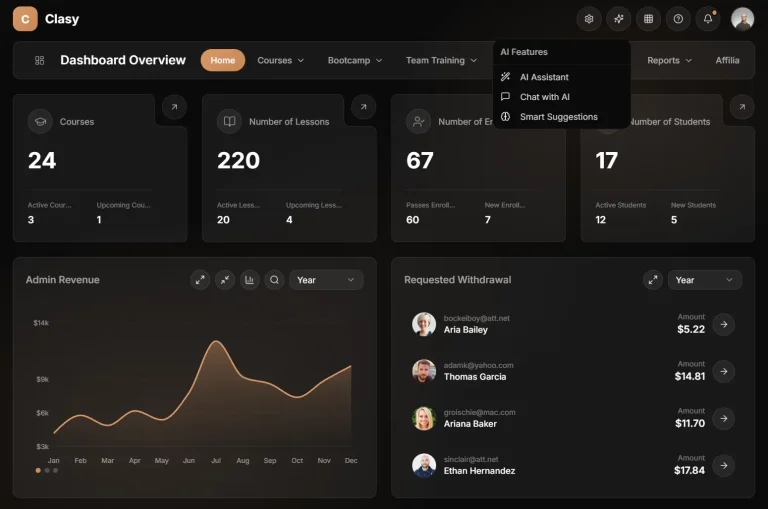
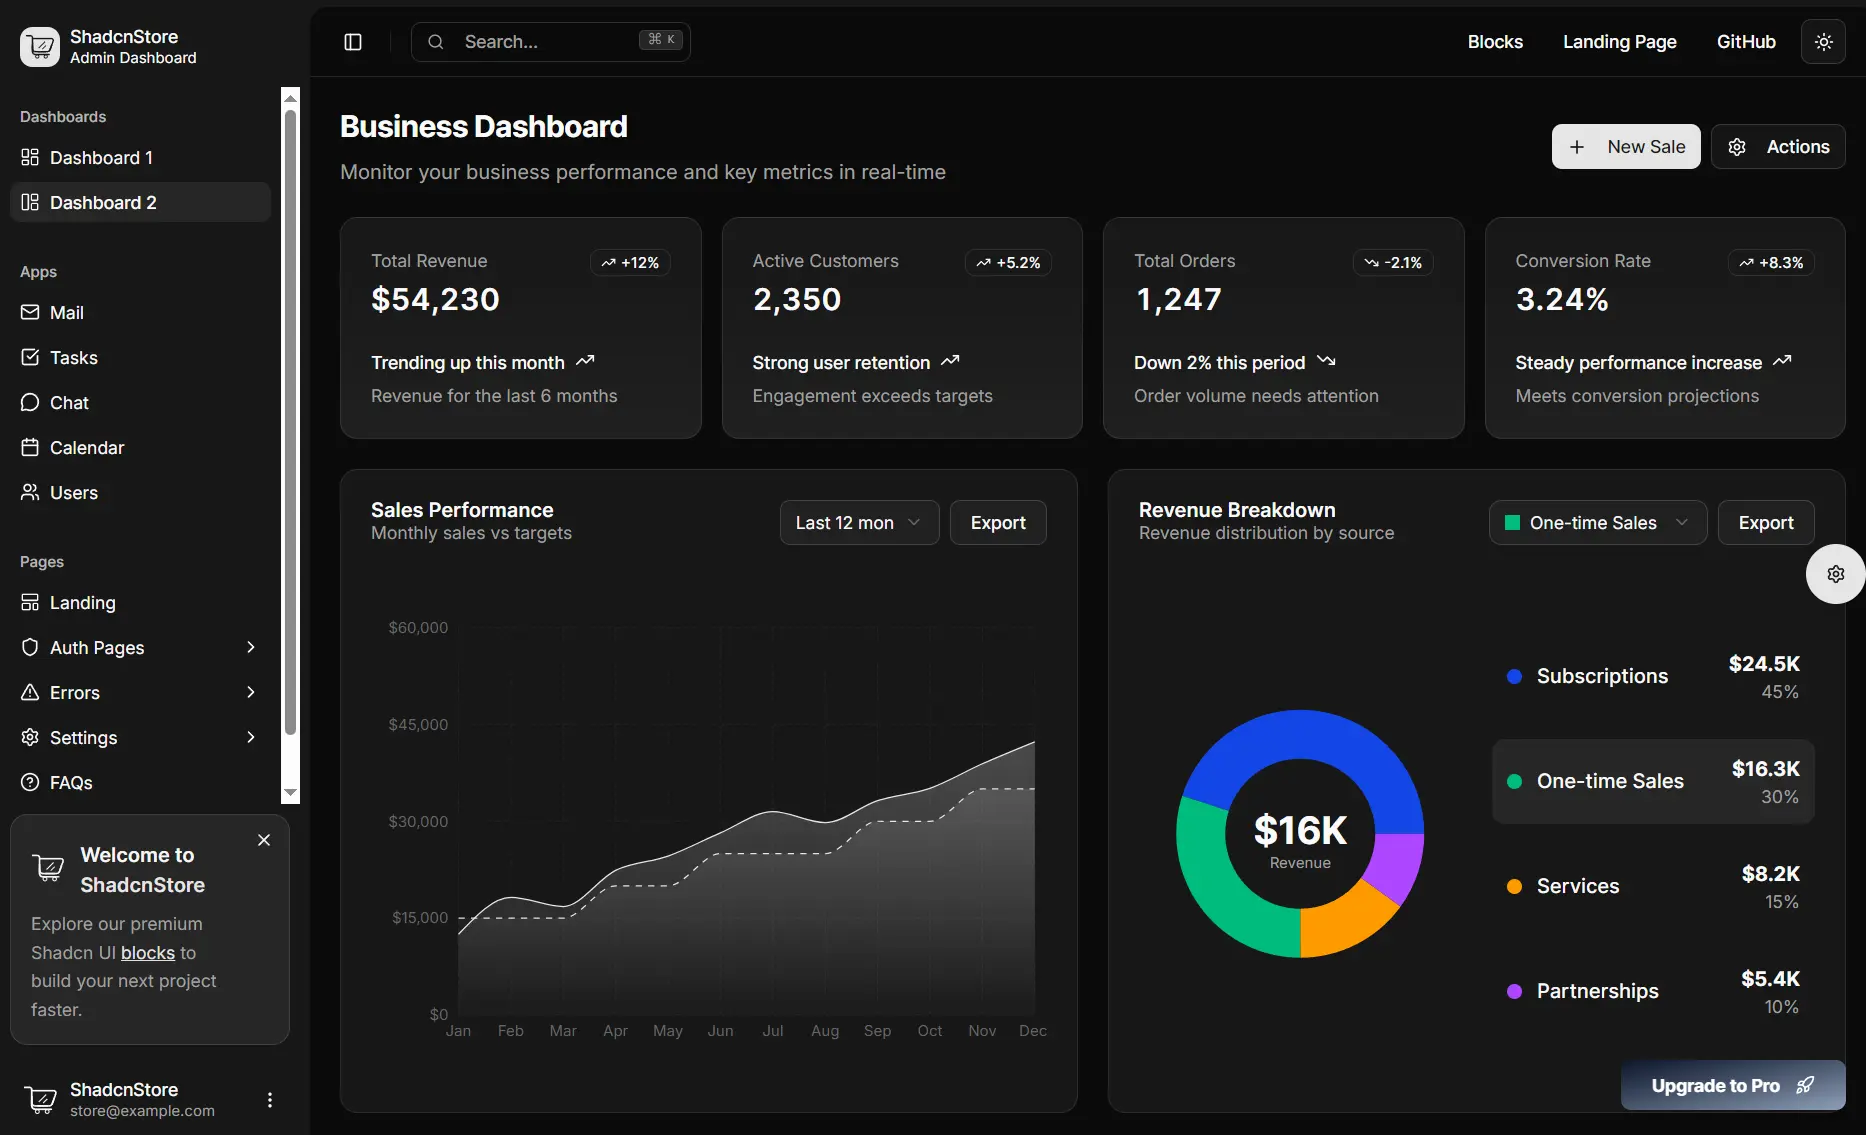
🖥️ Two Dashboard Variants: An Overview dashboard and an Analytics dashboard ship with separate metric layouts and chart configurations.
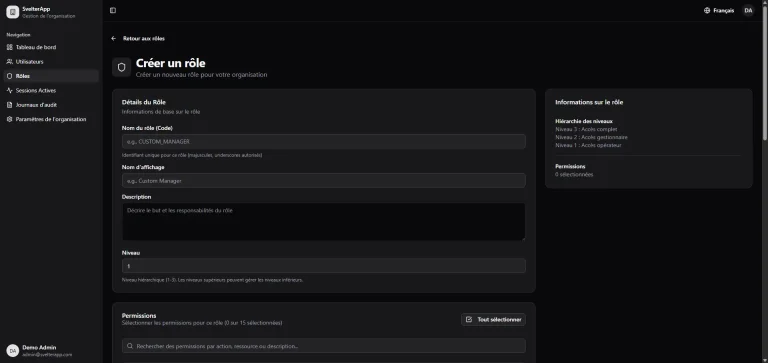
📄 30+ Pages: Authentication, settings, errors, FAQ, and pricing pages cover every standard admin section.
📱 App Demos: Mail, Tasks, Chat, Calendar, and Users apps demonstrate common admin interface patterns at full fidelity.
📊 Data Tables: TanStack Table handles sorting, filtering, and pagination across large data sets.
📈 Charts: Recharts renders analytics visualizations on both dashboard variants.
🎨 Live Theme Customizer: tweakcn controls real-time color and sidebar layout changes across every component.
🌙 Dark and Light Mode: Theme switching responds to user preference on all pages.
⚡ Dual Framework Support: Vite and Next.js 15 versions maintain identical page and component coverage.
🔐 Authentication Pages: Three layout variants each for login, signup, and password recovery give you multiple design options out of the box.
🌐 Landing Page: Hero, features, pricing, testimonials, FAQ, and contact sections form a complete marketing template.
✅ Form Validation: React Hook Form and Zod handle form state and schema validation across all input-heavy pages.
📦 State Management: Zustand manages application state across the dashboard and app demos.
Use Cases
- Build a SaaS admin dashboard from editable React and TypeScript pages.
- Launch a product site with matching dashboard and landing page UI.
- Prototype internal tools with tables, charts, settings, and account screens.
- Create a Next.js App Router dashboard with grouped application routes.
How to Use It
Table Of Contents
Clone the Repository
The repository contains two top-level directories: vite-version and nextjs-version. Choose one to start.
git clone https://github.com/silicondeck/shadcn-dashboard-landing-template
cd shadcn-dashboard
Vite Version Setup
The Vite version is the faster option for local development. The dev server runs on port 5173.
cd vite-version
pnpm install
pnpm dev
Open http://localhost:5173 in your browser. The dashboard lives at /dashboard and the landing page at /landing.
Next.js Version Setup
The Next.js version uses the App Router and suits production deployments. Its dev server runs on port 3000.
cd nextjs-version
pnpm install
pnpm dev
Open http://localhost:3000. Route groups in the src/app/ directory separate dashboard routes (/(dashboard)/) from authentication routes (/(auth)/), so each section gets its own layout file.
Start the dev server, then navigate to these paths to explore the included pages:
- Dashboard:
/dashboardand/dashboard-2 - Landing Page:
/landing - Mail App:
/mail - Tasks App:
/tasks - Chat App:
/chat - Calendar App:
/calendar - User Management:
/users - Authentication:
/auth/sign-in,/auth/sign-up,/auth/forgot-password - Settings:
/settings/account,/settings/appearance,/settings/billing,/settings/notifications,/settings/connections - Error Pages:
/errors/404,/errors/500,/errors/401,/errors/403 - FAQ and Pricing:
/faqs,/pricing
Development Commands
Vite version:
pnpm dev          # Start development server
pnpm build        # Build for production
pnpm preview      # Preview production build
pnpm lint         # Run ESLint
Next.js version:
pnpm dev          # Start development server
pnpm build        # Build for production
pnpm start        # Start production server
pnpm lint         # Run Next.js linter
Theme Customization
Using the Live Customizer
The template includes a built-in theme customizer panel powered by Tweakcn. Click the theme button in the dashboard layout to open it. The panel exposes preset color themes and sidebar layout variants. Changes apply across every component in real time.
The available preset themes are: Default (blue), Dark, Rose (pink), Green, Orange, Red, and Violet.
Adding a Custom Theme via TypeScript
To add a custom branded theme to the live customizer, define a theme object in your theme configuration file, such as src/config/theme-data.ts:
export const customTheme = {
  name: "Custom Brand",
  cssVars: {
    light: {
      primary: "210 100% 50%",
      "primary-foreground": "0 0% 98%",
      secondary: "210 100% 95%",
      "secondary-foreground": "210 100% 20%",
      accent: "210 100% 90%",
      "accent-foreground": "210 100% 15%",
    },
    dark: {
      primary: "210 100% 60%",
      "primary-foreground": "210 100% 15%",
    },
  },
};
Register this object in the theme customizer configuration to make it selectable in the panel.
Manual CSS Variable Customization
To change colors directly, update the CSS variables in globals.css (Next.js) or index.css (Vite). The template uses the oklch color format as part of Tailwind CSS v4’s updated color system:
:root {
  --primary: oklch(0.5 0.2 240);
  --primary-foreground: oklch(0.98 0.02 240);
  --secondary: oklch(0.96 0.01 240);
  --secondary-foreground: oklch(0.2 0.02 240);
}
.dark {
  --primary: oklch(0.7 0.2 240);
  --primary-foreground: oklch(0.15 0.02 240);
}
Any variable you override in these files takes precedence over the default theme.
Removing the Theme Customizer
Vite version:
- Delete
src/components/theme-customizer.tsx. - Remove the theme customizer button reference from the dashboard layout file.
- Remove any theme-related imports from your main layout file.
- Delete the
src/components/theme-customizer/folder if it exists.
Next.js version:
- Delete
src/components/theme-customizer.tsx. - Remove the theme customizer button from
src/app/layout.tsx. - Remove theme-related imports from your layout files.
- Delete the
src/components/theme-customizer/folder if it exists.
Related Resources
- Dashboard: Discover more modern dashboard and admin panel templates.
- TanStack Table: Headless table library that drives the advanced data tables in the Users and Tasks pages.
- Recharts: Composable charting library built on D3 that the Analytics dashboard uses for visualizations.
FAQs
Q: Can I use this template in a commercial project?
A: Yes. The MIT license covers commercial use, modification, and redistribution without restriction.
Q: Can I use only one framework version and delete the other?
A: Yes. Each version is a self-contained project with its own package.json and no shared build dependencies. Delete the directory you do not need.
Q: How do I add a new page to the dashboard?
A: In the Vite version, add a new folder under src/app/ and create the route file there. In the Next.js version, add a folder inside the (dashboard) route group under src/app/. Follow the naming conventions already in each directory.
Q: Which version should I choose for production
A: Choose Next.js when your project needs App Router routing, production builds, and a Next.js deployment workflow.
Q: When should I choose the Vite version
A: Choose Vite when you want a React dashboard starter with fast local development and client side routing control.