The Future of Web Dev
The Future of Web Dev
Modern Push Notification Library for Next.js – Next-Push
A lightweight TypeScript push notification library for Next.js with automatic VAPID key management and React hooks integration.
Next-Push is a modern, lightweight, customizable push notification library created for Next.js applications.
It works on both client and server sides, supports all modern browsers, and includes built-in VAPID key handling for secure communication.
Features
🔔 React hook integration for client-side push notifications.
🛡️ Complete TypeScript support with proper type definitions.
⚡ Minimal bundle size with zero heavy dependencies.
🔒 Built-in VAPID key support for secure push notifications.
📱 Cross-platform compatibility across modern browsers and devices
🎯 Customizable notification content and behavior options.
🔄 Automatic service worker registration and subscription handling.
🏗️ Modular architecture with separate client and server modules.
🤖 Simplified service worker setup with provided templates.
🔑 Automatic VAPID key management from environment variables.
🌐 React Context provider for global state management.
🛡️ Built-in error handling with detailed error types.
⚡ Auto-subscription capability when permission is granted.
📊 Access to current PushSubscription object and state.
Use Cases
- E-commerce platforms sending order updates and promotional notifications to customers
- Content management systems notifying users about new articles, comments, or content updates
- Project management tools alerting team members about task assignments, deadlines, and project milestones
- Social media applications delivering real-time notifications for messages, likes, and friend requests
- Financial applications sending transaction alerts, account balance updates, and security notifications
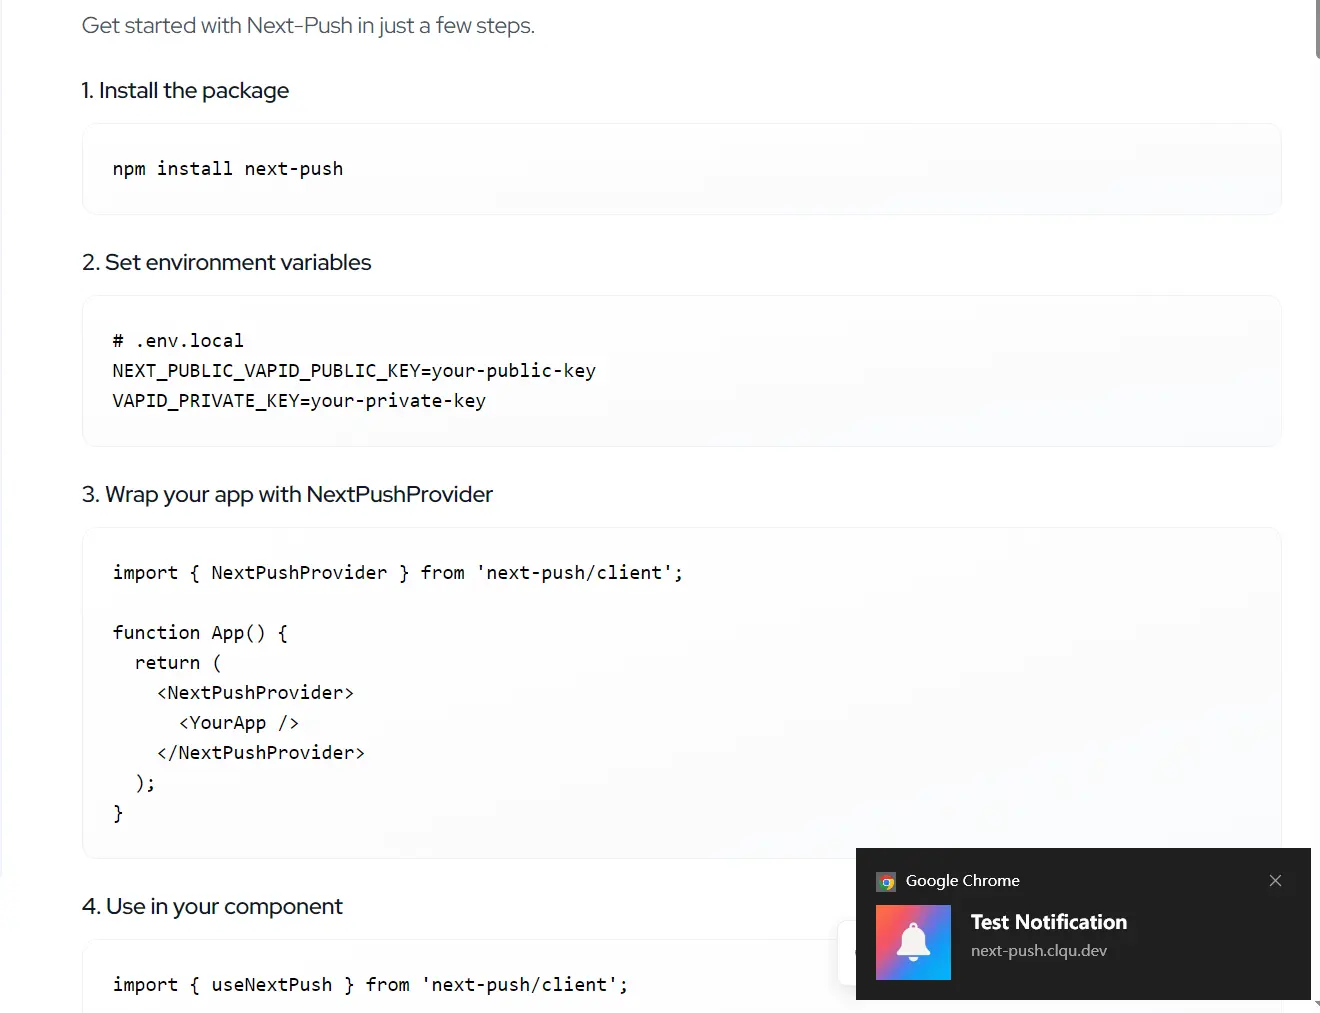
How to Use It
1. Add the package to your project using your preferred package manager.
# Yarn
$ yarn add next-push
# NPM
$ npm install next-push
# PNPM
$ pnpm install next-push
2. VAPID (Voluntary Application Server Identification) keys are required to send push messages securely. You can generate them using the web-push library.
npx web-push generate-vapid-keys3. Create a .env.local file in your project’s root directory and add the keys.
POSTGRES_URL=""
NEXT_PUBLIC_VAPID_PUBLIC_KEY=""
VAPID_PRIVATE_KEY=""
4. Create a service worker file at public/sw.js. This script will run in the background to handle incoming push events.
// public/sw.js
self.addEventListener('push', (event) => {
  const data = event.data.json();
  const options = {
    body: data.message,
    icon: data.icon || '/icon.png',
    data: {
      url: data.url
    }
  };
  event.waitUntil(
    self.registration.showNotification(data.title, options)
  );
});
self.addEventListener('notificationclick', (event) => {
  event.notification.close();
  if (event.notification.data?.url) {
    event.waitUntil(
      self.clients.openWindow(event.notification.data.url)
    );
  }
});
5. Wrap your application in NextPushProvider within your _app.tsx file. This provider manages the global state for push notifications.
// pages/_app.tsx
import { NextPushProvider } from 'next-push/client';
function MyApp({ Component, pageProps }) {
  return (
    <NextPushProvider>
      <Component {...pageProps} />
    </NextPushProvider>
  );
}
export default MyApp;
6. Now, you can use the useNextPushContext hook in any component to manage subscriptions.
// components/SubscribeButton.tsx
import { useNextPushContext } from 'next-push/client';
export function SubscribeButton() {
  const { subscribe, unsubscribe, subscribed, loading } = useNextPushContext();
  const handleSubscription = () => {
    if (subscribed) {
      unsubscribe();
    } else {
      subscribe();
    }
  };
  return (
    <button onClick={handleSubscription} disabled={loading}>
      {subscribed ? 'Unsubscribe' : 'Subscribe'}
    </button>
  );
}
7. To send notifications, create an API route. This example shows how to create a route at pages/api/send-notification.ts.
// pages/api/send-notification.ts
import { createServerPush } from 'next-push/server';
import type { NextApiRequest, NextApiResponse } from 'next';
const pushServer = createServerPush(
  'mailto:[email protected]',
  {
    publicKey: process.env.NEXT_PUBLIC_VAPID_PUBLIC_KEY!,
    privateKey: process.env.VAPID_PRIVATE_KEY!
  }
);
export default async function handler(req: NextApiRequest, res: NextApiResponse) {
  if (req.method === 'POST') {
    const { subscription, notification } = req.body;
    const result = await pushServer.sendNotification(subscription, notification);
    if (result.success) {
      res.status(200).json({ message: 'Notification sent.' });
    } else {
      res.status(500).json({ error: result.error });
    }
  } else {
    res.setHeader('Allow', 'POST');
    res.status(405).end('Method Not Allowed');
  }
}
Related Resources
- Web Push Protocol Documentation – Comprehensive guide to understanding web push notifications and the underlying protocols.
- Service Worker API Reference – Official documentation for Service Worker APIs used in push notification implementation.
- Next.js API Routes Guide – Documentation for creating API endpoints to handle server-side push notification logic.
FAQs
Q: Do I need to configure VAPID keys manually in the component?
A: No, Next-Push automatically loads VAPID keys from environment variables. You only need to set NEXT_PUBLIC_VAPID_PUBLIC_KEY in your environment file, and the library will handle the rest.
Q: What happens if a user denies notification permission?
A: The library provides detailed error handling with specific error types. When permission is denied, you’ll receive a PERMISSION_DENIED error type, allowing you to show appropriate UI feedback to guide users to browser settings.
Q: Can I send notifications to multiple users at once?
A: Yes, Next-Push includes a sendNotificationToAll method that accepts an array of subscriptions and sends notifications to all subscribers with detailed success and failure reporting.
Q: Does Next-Push work with all browsers?
A: Next-Push works with all modern browsers that support service workers and the Push API. The library includes built-in feature detection through the isSupported property to handle browser compatibility gracefully.
Q: How can I customize the content of a push notification?
A: You can customize the notification by passing a payload object when you call sendNotification on the server side. This object can include a title, message, icon, and a URL to open when the user clicks the notification.